Nutritional Healing Center
  • Home
  • About
  • Services
    • Wellness Coaching
    • Foot Detox
    • Quantum Cellular Scan
    • Full Price List
    • PureLife PEMF
  • Recipes
  • Testimonials
  • Announcements
  • Contact
    • Nutrition Response Testing
  • Blog
  • Members Exclusive

​Stay Up To Date

Our Recipe Collection

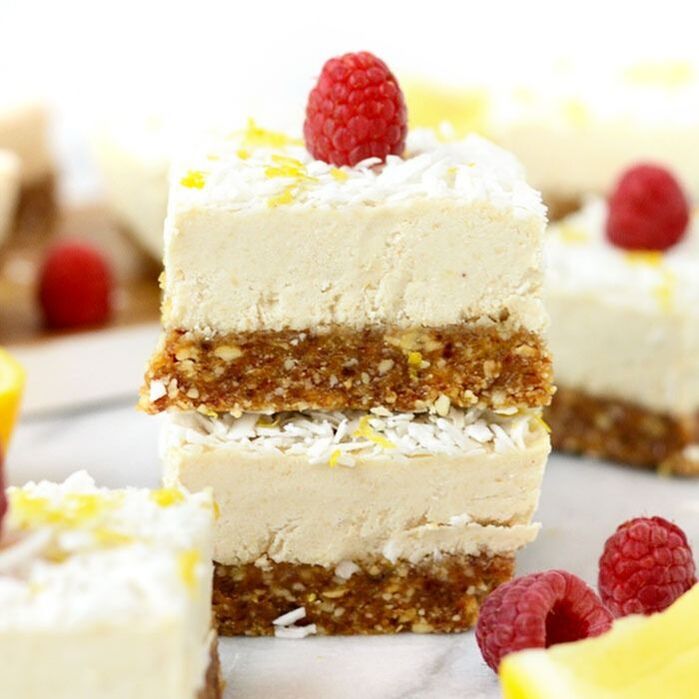
Lemon Vegan Cheesecake Bars

7/24/2019

0 Comments

 
Picture
INGREDIENTS
RAW CRUST
  • 2 cups pitted Medjool dates, packed (~20)
  • 2 cups raw unsalted cashews
  • 1/8 teaspoon sea salt (or more, to taste)
VEGAN CHEESECAKE FILLING
  • 2 cups raw cashews, soaked
  • 1 cup coconut cream
  • 2 tablespoons coconut oil
  • 2 tablespoons honey (or maple syrup for vegan option)
  • juice from 1 lemon (~1/3 cup)
  • pinch of sea salt
  • zest from one lemon
INSTRUCTIONS
  1. First, place two cups of cashews into a medium/large size bowl and cover them with boiling water. Let them soak for at least an hour or overnight. These cashews are for the filling.
  2. Next, place crust ingredients into a high-speed food processor and process until crumbly.
  3. After ingredients are blended, spray a 9×9-inch pan with coconut oil cooking spray. Gently press crust evenly into the bottom of the pan. Set aside.
  4. Once cashews have soaked for the appropriate amount of time (cashews should be soft and squishy) place all ingredients for the lemon filling (except coconut oil) into a high-speed food processor or Vitamix and blend until smooth.
  5. When the filling is a smooth consistency, add coconut oil and mix one more time to fully combine all ingredients.
  6. Pour filling contents on top of crust. Spread evenly with a spatula and place pan into the freezer for 1-2 hours to set.
  7. When bars are hard and ready to eat. Remove from freezer, top with shredded coconut and lemon zest.

Recipe and Photo from Fit Foodie Finds
0 Comments

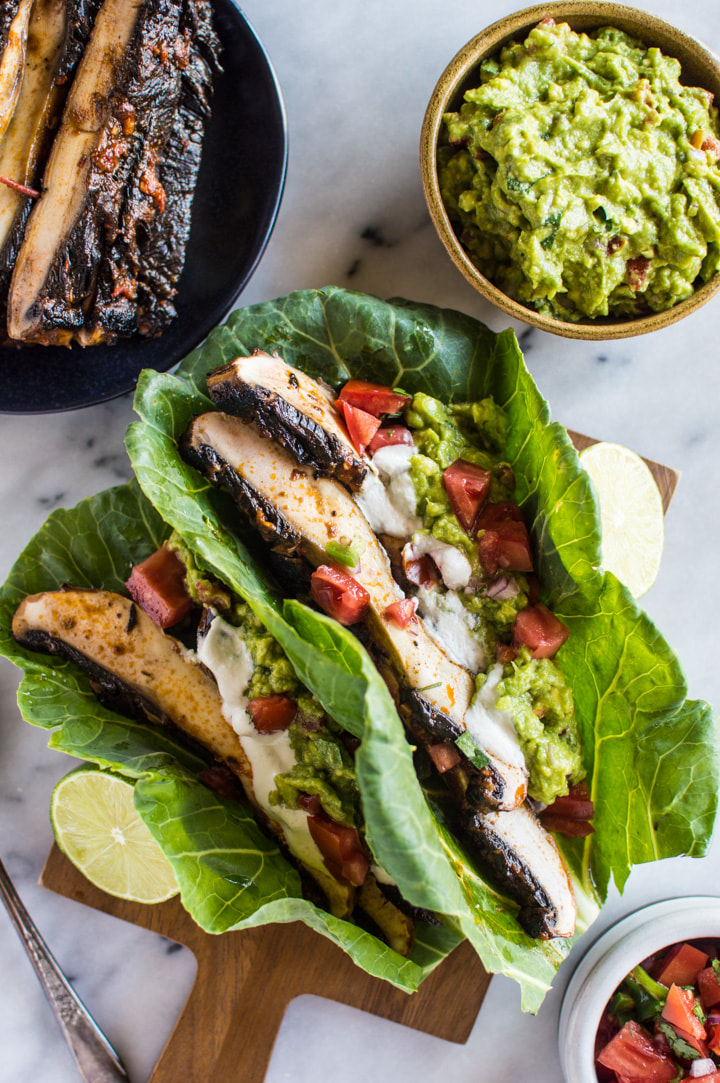
Harissa Portobello Mushroom “Tacos”

7/22/2019

1 Comment

 
Picture
​INGREDIENTS
Portobello Mushrooms
  • 1 pound (450g) portobello mushrooms
  • 1/4 cup (60g) spicy harissa, or use a mild harissa
  • 3 tablespoons olive oil, divided
  • 1 teaspoon ground cumin
  • 1 teaspoon onion powder
  • 6 collard green leaves
Guacamole
  • 2 medium ripe avocados
  • 2 tablespoons chopped tomatoes
  • 2 tablespoons chopped red onion
  • 1 1/2 to 2 tablespoons lemon or lime juice
  • pinch of salt
  • 1 tablespoon chopped cilantro
Optional Toppings
  • cashew cream
  • chopped tomatoes
  • chopped cilantro
​INSTRUCTIONS
  1. Remove the stem of the portobellos. Rinse mushrooms and pat dry.
  2. Mix harissa, 1 1/2 tablespoons olive oil, cumin, and onion powder in a bowl. Brush each mushroom with the harissa mixture, making sure to cover the edges of the mushroom as well. Let mushroom marinade for 15 minutes.
  3. While the mushrooms are marinating, prepare guacamole. Halve and pit the avocados and scoop out the flesh. Mash avocados and mix in chopped tomatoes, red onion, lemon (or lime) juice, salt, and cilantro. Set aside.
  4. Rinse collard greens. Chop off the tough stems and set aside.
  5. When the mushrooms are done marinating, heat 1 1/2 tablespoons of olive oil in a skillet or sauté pan over medium-high heat. Place the portobello mushrooms in the pan and cook for 3 minutes. Flip over and cook for another 2 to 3 minutes. Each side should be browned.
  6. Turn off the heat and let the mushrooms rest for 2 to 3 minutes before slicing.
  7. Take a collard green leaf and fill it with a few slices of portobello. Add guacamole, chopped tomatoes, cashew cream, and cilantro to your liking.

​Recipe and Photo from Healthy Nibbles and Bits
1 Comment

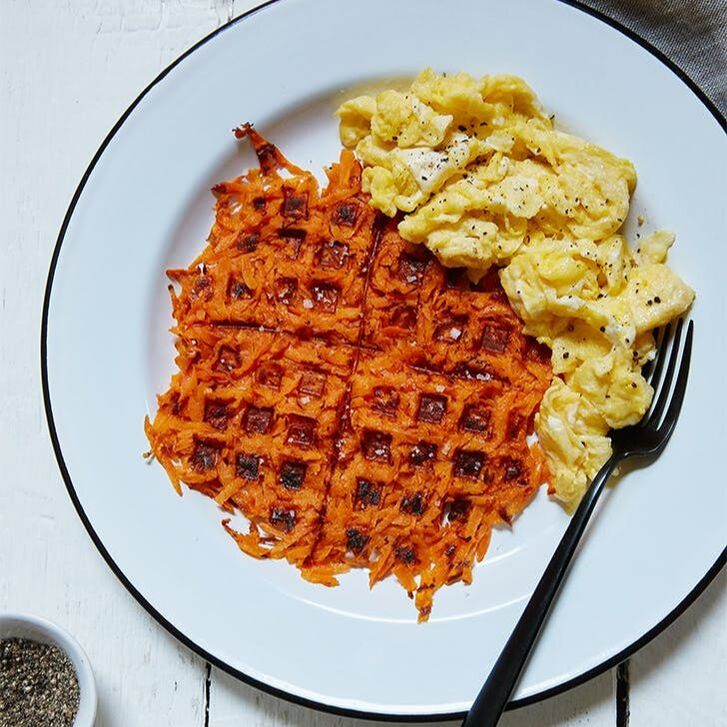
Sweet Potato Hash Browns Made with a Waffle-Iron

7/16/2019

0 Comments

 
Picture
Ingredients
  • ​2 medium sweet potatoes, peeled
  • 1 medium russet potato, peeled
  • 3 tablespoons butter, melted
  • Salt and freshly ground black pepper, to taste
Instructions
1. Plug in and preheat your waffle iron. Spray the interior with nonstick spray.
2. Use the medium-holed side of a box grater to grate the potatoes. In a large bowl, toss the potatoes to combine. Add the butter and toss to combine. Season with salt and pepper.
3. Divide the mixture into 6 even portions. Mound a portion onto the heated waffle iron and then spread it toward the edge to form an even layer. Close the waffle iron and cook on high heat for 4 to 5 minutes, until golden and crisp.
4. Repeat with the remaining potato mixture. Serve immediately (preferably with a side of eggs).

Recipe and Photo from Pure Wow
0 Comments

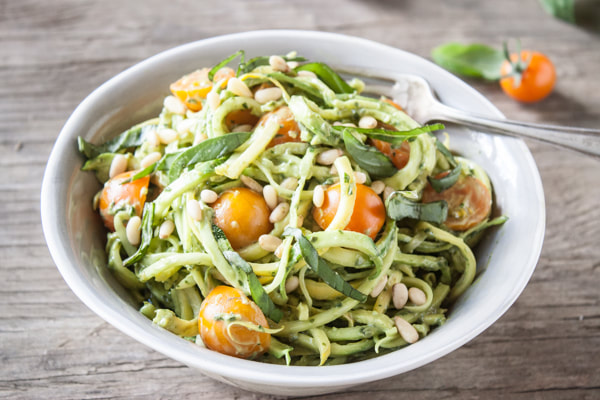
ZUCCHINI NOODLES WITH CREAMY AVOCADO-BASIL SAUCE

7/16/2019

0 Comments

 
Picture
Ingredients
  • 2 large zucchinis, julienned or spiralized
  • 1 cup cherry tomatoes, sliced in half
  • 1/2 cup pine nuts
  • 1/2 cup fresh basil, julienned
  • salt and pepper to taste
  • crushed red pepper flakes to taste
For the avocado basil sauce:
  • 1 medium avocado, pitted
  • 1 1/2 cups fresh basil leaves
  • 1/4 cup pine nuts
  • 3 cloves of garlic, minced
  • 1/2 cup extra virgin olive oil + more to thin if necessary
  • 1 Tablespoon fresh lemon juice
  • 1/2 teaspoon fine sea salt
​Preparation
  1. Prepare the sauce by combining all ingredients in a food processor and processing until smooth. Taste test and adjust seasonings as necessary. Add a little more oil if too thick and set sauce aside.
  2. Place the julienned zucchini noodles in a large bowl and toss with 1/2 of the avocado-basil sauce. Add cherry tomatoes, pine nuts, basil, salt and pepper. Taste test and add more of the avocado-basil sauce if necessary.
  3. Serve at room temperature and enjoy.

​Recipe and Photo from Dishing Up the Dirt
0 Comments

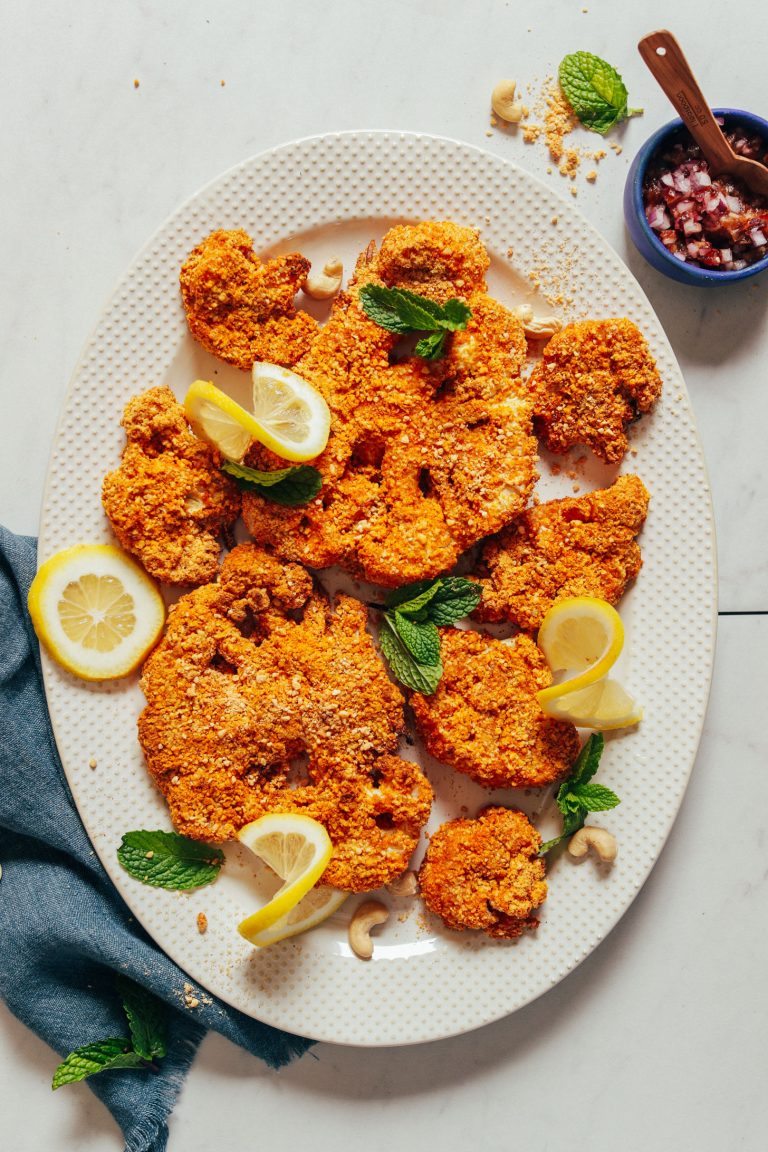
CASHEW-CRUSTED CAULIFLOWER “STEAK”

7/5/2019

0 Comments

 
Picture
Ingredients
CAULIFLOWER
  • 1 large head cauliflower (or sub 2 small for 1 large)
ALMOND BUTTERMILK
  • 1 cup unsweetened plain dairy-free milk (cashew milk works best! — we prefer Forager brand)
  • 1 Tbsp lemon juice
COATING
  • 1 ½ cups raw cashews (or sub other nut, such as pistachios or almonds, though we haven't tested and can't guarantee the results)
  • 1 tsp sea salt (plus more to season cauliflower before coating)
  • 1/4 tsp cayenne pepper (optional)
  • 3/4 tsp garlic powder
  • 1 ½ tsp curry powder
  • 1 ½ tsp smoked paprika
  • 3 Tbsp arrowroot or cornstarch
  • 1-2 Tbsp avocado oil (if avoiding oil, omit)​
FOR SERVING optional
  • Date-lemon relish*
  • Hummus (or another favorite dip)
  • Fresh mint
Instructions
  1. Preheat oven to 425 degrees F (218 C) and line a large baking sheet with parchment paper. If you have a cooling rack that is oven safe, you can place that over the parchment paper to help the cauliflower crisp up even more. However, we tested it with and without and both work. The primary difference is that the cauliflower undersides can get a little more browned when not using a cooling rack. An easy workaround is cooking the cauliflower in the upper third of the oven to prevent the bottoms from burning.
  2. TO CUT "STEAKS," trim the stem and leaves off the cauliflower, being careful not to remove the center of the stem as it’s what holds the “steaks” together.
  3. Flip the cauliflower stem-side down and visually map out how many “steaks” you hope to get. With a large head of cauliflower, I aim for 3 large “steaks,” and know there'll be enough remaining pieces to constitute another “steak.” It can be helpful to look at the underside of the cauliflower to see which way the stalks are running to inform which way you’ll slice (cut with the stalks instead of against them). But it’s very common for the end pieces to crumble, so just do your best to get 3 even “steaks” and slice any remaining bits into flat pieces (see photo). The little pieces are just as (if not more) delicious.
  4. Add 1 inch water and a steamer basket to a large pot and bring to a low boil over medium-high heat. Once simmering, add cauliflower “steaks,” cover, and steam for 4-5 minutes to partially cook. This will soften the “steaks” to speed baking time and ensure the inside is tender when the exterior is crispy and brown. Once slightly softened, remove and set aside on a separate dish.
  5. In the meantime, prepare your vegan buttermilk by adding cashew or almond milk to a shallow dish (shallow and wide enough to dip the cauliflower in) and add lemon juice. Stir and set aside.
  6. Next, prepare the cashew coating by adding cashews, salt, cayenne pepper (optional), garlic powder, curry powder, paprika, and arrowroot starch or cornstarch to a food processor. Mix until a semi-fine meal is achieved. A little texture is okay, but you want it pretty fine so it can coat the cauliflower. Transfer coating to a shallow dish (again, shallow and wide enough to dip the cauliflower in) and set aside.
  7. Dip the slightly steamed cauliflower “steaks” in the almond buttermilk, ensuring both sides are adequately coated. Then set back on platter (where excess will drip off) and season both sides with a pinch of salt.
  8. Next, dredge the cauliflower in the cashew coating until thoroughly coated, using a spoon or your hands to add more coating to any bare spots. Then transfer cauliflower “steaks” to your prepared baking sheet (with or without a cooling rack). Lastly, drizzle with a little avocado oil to help them crisp up (optional, but recommended).
  9. Bake for 25-35 minutes, or until the cauliflower “steak” is easily pierced with a knife and the exterior appears golden brown and crispy. Remove from oven to cool slightly.
  10. Enjoy as is or (our preferred method!) garnish serving plates with a few tablespoons of your favorite hummus (or similar sauce) and top with cauliflower “steak” and date relish (made by simply mixing chopped dates, lemon juice, and diced onion). Garnish with freshly chopped mint for a pop of color and flavor.
  11. Best when fresh. Store leftovers covered in the refrigerator up to 3-4 days. Reheat in a 350 degree F (176 C) oven until hot for best results. Not freezer friendly.

​Recipe and Photo from Minimalist Baker
0 Comments

Fried Cauliflower Rice

6/19/2019

0 Comments

 
Picture
​INGREDIENTS
  • 1 medium head cauliflower (or 5 to 6 cups riced cauliflower)
  • 8 ounces thick-cut bacon (about 8 slices, optional)
  • 2 large eggs
  • 1 tablespoon minced ginger
  • 3 cloves garlic, minced
  • 2 medium carrots, diced (about 1 cup)
  • 1 cup fresh or frozen corn kernels
  • 1/2 cup fresh or frozen peas
  • 4 medium scallions, thinly sliced
  • 1/4 cup chopped cashews, almonds, or other nuts (optional)
  • 2 to 3 tablespoons soy sauce, or 1 to 2 tablespoons tamari
INSTRUCTIONS
  1. Cut the cauliflower into florets, discarding the tough inner core. Working in batches, pulse the cauliflower in a food processor until it breaks down into rice-sized pieces. You should have 5 to 6 cups of cauliflower "rice."
    → For step-by-step instructions, see How To Make Cauliflower Rice or Couscous.
  2. Place the bacon in a 12-inch skillet over medium heat and cook until crisped and browned. Using tongs, transfer to a plate lined with a paper towel to drain. Once cooled, coarsely chop and set aside. Drain off all but a teaspoon of bacon grease (or use 1 teaspoon vegetable oil), reserving the remaining grease.
  3. Place the pan back over medium-high heat. Place the eggs in a small bowl, whisk to break up, then pour into the pan. Quickly scramble the eggs or make an omelet. Transfer the eggs to a cutting board and coarsely chop; set aside.
  4. Wipe the skillet clean with paper towels and add 1 tablespoon reserved bacon grease or vegetable oil over medium-high heat. Add the ginger and garlic and sauté until fragrant, about 30 seconds. Add the carrots and sauté until crisp-tender, about 2 minutes. Add the corn, peas, and cauliflower "rice," and stir to thoroughly combine.
  5. Reduce the heat to medium, cover the pan, and cook until the cauliflower is tender, 5 to 8 minutes. Uncover and stir in the reserved bacon and eggs, scallions, nuts if using, and 2 tablespoons soy sauce or 1 tablespoon tamari. Taste and add more soy sauce or tamari to taste. Serve immediately.

​Recipe from Kitchn
0 Comments

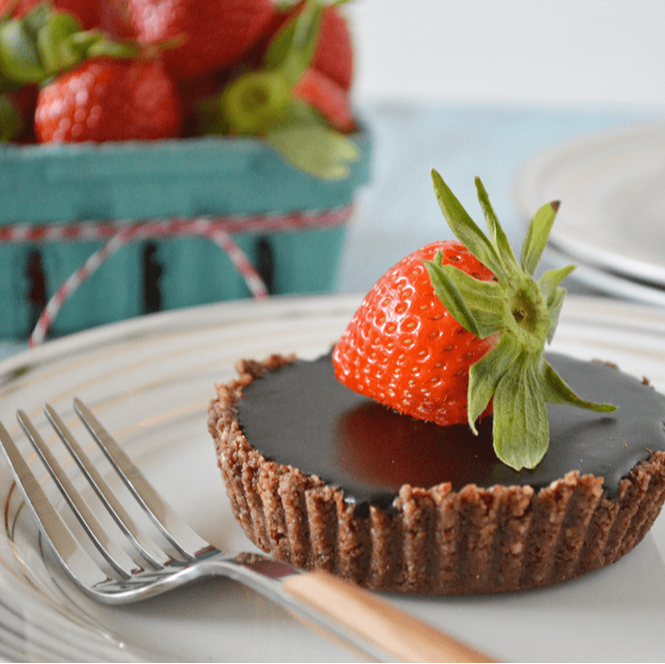
Chocolate Hazelnut Tart

5/30/2019

0 Comments

 
Picture
Ingredients
Supplies
  • 4 Foil or Foil-Lined Muffin Cups

Crust
  • 3/4 cups Fine Hazelnut Flour I prefer Bob's Red Mill
  • 2 tsp Natural Cocoa Powder
  • 3 Tbsp Coconut Oil melted
  • 1 Tbsp Pure Maple Syrup
  • 1/8 tsp Sea Salt

Filling
  • 3 Tbsp Coconut Oil
  • 3 Tbsp Full-Fat Coconut Milk
  • 3 Tbsp Maple Syrup
  • 6 Tbsp Cocoa Powder I use half Natural, half Black Onyx
  • 1/2 tsp Pure Vanilla Extract
Instructions
Prepare Tart Molds (if you do not already have mini tart pans):
  • Use foil or foil-lined muffin cups (paper cups are too flimsy), place a regular-mouth mason jar top-down in the center of the muffin liner and press down until the liner is widened.

Crust
  • In a medium bowl, add all crust ingredients and stir with a fork until evenly combined.
  • Divide mixture into quarters and press evenly into the bottom and sides of the prepared tart pans/molds. If using the muffin-liner method, be careful not to crush the accordion edges.
  • Set the prepared crusts in a small baking pan with a flat bottom and set aside while you prepare the filling.

Filling
  • Heat coconut oil, coconut milk, and maple syrup in a small saucepan over medium-low heat until just melted and smooth. Do not let it come to a simmer or boil.
  • Remove from heat and whisk in the cocoa powder until smooth and glossy.
  • Whisk in the vanilla just until combined.
  • Option 1: Pour the filling mixture evenly between the 4 prepared tart crusts.
  • Place tarts in the refrigerator to chill for at least 1 hour or overnight, or until firm. If you didn't heat the filling too much, your chill time will be significantly reduced.
  • Garnish with strawberries, sifted cocoa powder, or crushed hazelnuts (if desired) and serve chilled.

​Recipe and Photo from Our Paleo Life
0 Comments

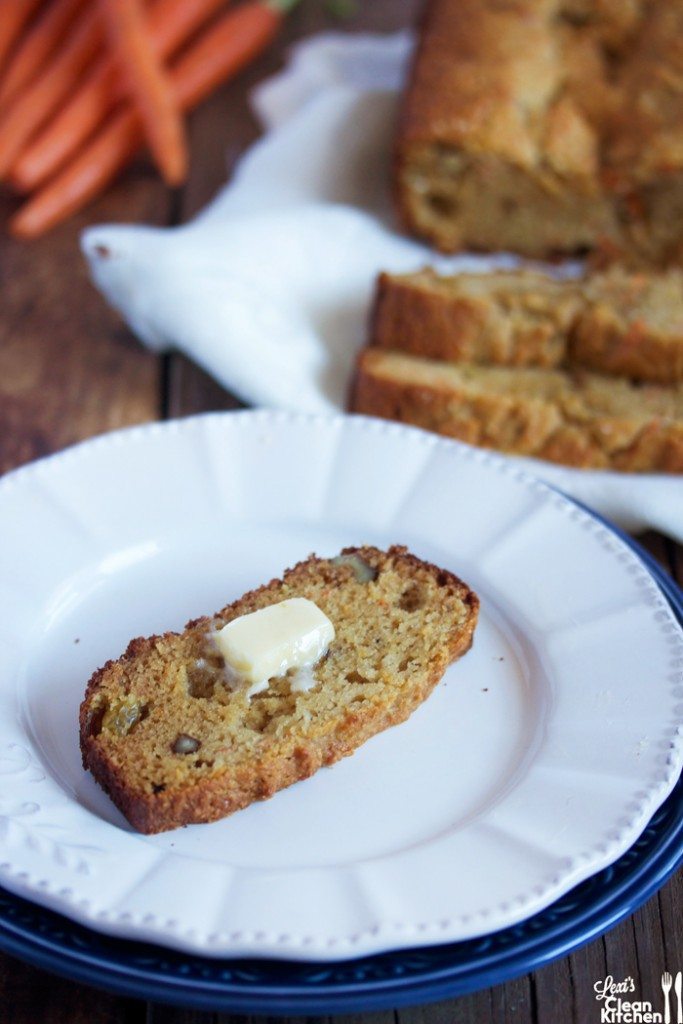
Carrot Cake Loaf

5/24/2019

0 Comments

 
Picture
Ingredients
  • 2 cups almond flour
  • 3 tsp coconut flour
  • 3 eggs
  • 2 tbsp coconut oil
  • 3 tbsp raw honey (add an additional 1/2 tbsp if you like things a bit sweeter)
  • 1/3 cup unsweetened apple sauce
  • 1/3 cup grated organic carrots
  • 1 tsp organic vanilla extract
  • 1/8 tsp Himalayan sea salt
  • 1/2 tsp cinnamon
  • 1 tsp baking soda
  • 1 tsp baking powder
  • Optional: 1/3 cup Enjoy Life's mini chocolate chips
  • Optional: 1/4 cup raisins
  • Optional: 1/3 cup walnuts, chopped
Directions
  • 1. Preheat oven to 350
  • 2. In a mixing bowl, combine dry ingredients
  • 3. Add in wet ingredients and mix well
  • 4. Add in carrots and optional ingredients
  • 5. Grease bread pan
  • 6. Pour in batter
  • 7. Bake for 20-25 minutes until a toothpick comes out clean

​Recipe and Photo from Lexi's Clean Kitchen 
0 Comments

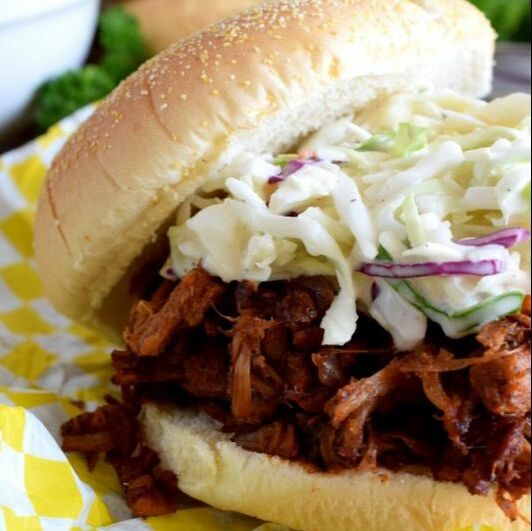
Vegetarian Pulled Pork

5/10/2019

0 Comments

 
Picture
Ingredients
  • 40 ounces canned jackfruit, packed in water, drained
  • 1 large onion,finely chopped
  • 1 tablespoon olive oil
  • 1 clove garlic,minced
  • 2 tablespoons chili powder, adjust for desired heat
  • 2 tablespoonsbrown sugar
  • 1 tablespoon paprika
  • 1 teaspoon cumin
  • 1/2 teaspoon salt
  • 1/2 teaspoon black pepper
  • 1 cup bbq sauce, see notes
​Instructions
  • Begin by draining the jackfruit and rinsing well under cold water. Using your fingers, massage the jackfruit and break the pieces apart; set aside
  • In a large sauté pan, heat the olive oil, add the onion and jackfruit; sauté until the onion is slightly caramelized
  • Add the remaining ingredients with the exception of the bbq sauce.  Continue to sauté over medium heat for 10-15 minutes. Stir often because brown sugar will burn easily.
  • Once cooked, use a fork to press the remaining larger pieces of jackfruit so that the pieces fall apart and resemble the fibers of cooked pork.
  • Add one cup of your favourite bbq sauce and stir into the pork.  Continue to cook until sauce is heated through.

Notes 
When selecting a bbq sauce, remember that some bbq sauces are already sweet, so you might want to cut back on the brown sugar, but don't cut it out completely.  Brown sugar is needed to help the jackfruit caramelize and brown.  Ideally, look for a low-sugar or sugar-free bbq sauce.As a side note, the longer you simmer the mixture, the deeper the flavour will be. Even though this dish is ready in 45 minutes, you can leave the "meat" to simmer for a longer period of time to intensify the flavour. If the mixture becomes dry, add 1 tablespoon of water and stir.  Keeping the lid on the pan will help to keep the pork moist if you plan to simmer for a longer period of time.

Recipe and Photo from Lord Byron's Kitchen
0 Comments

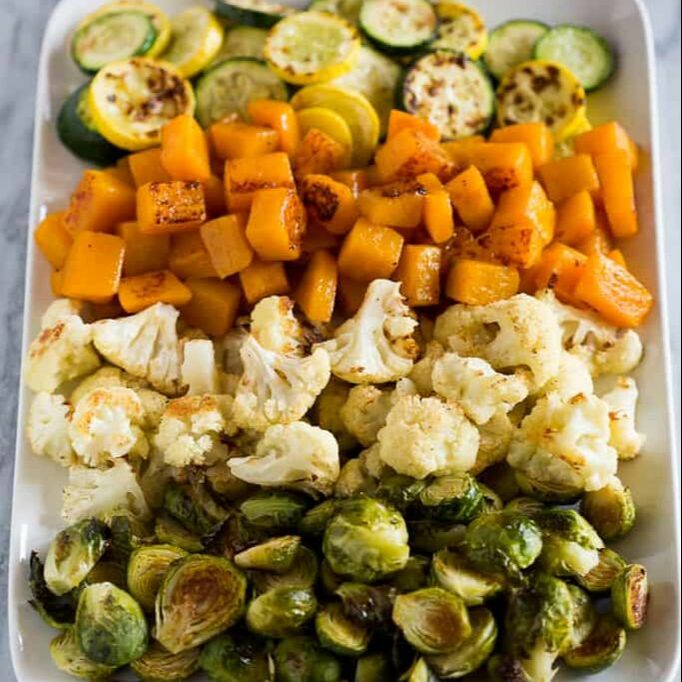
Roasted Vegetables

5/9/2019

0 Comments

 
Picture
Ingredients
  • 2 cups fresh broccoli florets
  • 1 small butternut squash , peeled, seeded and chopped
  • 1 zucchini , sliced and quartered
  • 1 yellow squash , sliced and quartered
  • 1 red bell pepper , chopped
  • 1 red onion , chopped
  • 2 Tablespoons olive oil
  • 4 cloves garlic , minced
  • 1/2 teaspoon herbes de provence
  • salt and freshly ground black pepper , to taste
Instructions
  1. Preheat oven to 425 degrees F. Lightly spray a baking sheet with nonstick spray.
  2. Place vegetables in a large bowl. Add olive oil, garlic and herbs de provence; season with salt and pepper, to taste. 
  3. Gently toss to combine. Pour vegetables into a single layer on the baking sheet.
  4. Bake for 12-15 minutes, or until tender. (Baking time may vary depending on the size of your vegetables).

Recipe and Photo from Tastes Better From Scratch
0 Comments
Forward>>

    Archives

    February 2020
    January 2020
    December 2019
    November 2019
    October 2019
    September 2019
    August 2019
    July 2019
    June 2019
    May 2019
    April 2019
    March 2019
    February 2019

    Categories

    All
    Beef
    Breakfast
    Chicken
    Dinner
    Drinks
    Fish
    Gluten Free
    Keto
    Lunch
    Recipes
    Shrimp
    Sides
    Slow Cooker
    Soup
    Treats
    Vegetarian
    Whole30

    RSS Feed

Site Links

Home
About
Services
Recipes
Testimonials
Announcements 
​Contact
​

Hours of Operation

Monday: 9-6
Tuesday: 2-6
Wednesday: 9-6
Thurs: ​Closed
Fri: 9-3
Sat: 9-2
Sun: Closed

Contact Information

Phone: 410-721-3338
Email: [email protected]
Address: 2135 Defense Hwy, Suite 1 Crofton, Maryland 21114
Yelp
Nutritional Healing Center logo

Member Affiliations

Picture
Picture
Picture
Picture

© 2019 Nutritional Healing Center  |  Sitemap
Site powered by Weebly. Managed by FreeLogoServices.com
  • Home
  • About
  • Services
    • Wellness Coaching
    • Foot Detox
    • Quantum Cellular Scan
    • Full Price List
    • PureLife PEMF
  • Recipes
  • Testimonials
  • Announcements
  • Contact
    • Nutrition Response Testing
  • Blog
  • Members Exclusive